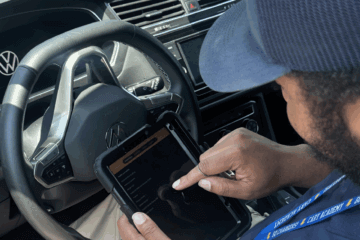
It’s amazing what photos can do for janitorial and facilities inspections. There’s just no better way to capture the conditions on-site, get examples to share with your team, and ensure that problems have been fixed. Plus, they’re fast!
On the flip side, not every inspection needs a photo. Knowing when to include photos, what to capture, and how to organize that data will help your team communicate quickly and effectively.
Why include photos with an inspection?
A few reasons you might snap a photo:
- To show a deficiency. Taking a photo of the problem makes it clear what the issue is, where your team can find it, and what a sub-par clean looks like.
- To close the loop on issues. Has a customer complained about a problem at one of your sites? Try including a photo of the resolution to show that the problem’s been solved. It’s visual proof of a job well done.
- To highlight great work. Snapping a photo of a well-cleaned room or line item gives you an example for the rest of the staff about how things should look. It’s also great for including in employee reviews or recognition! You’re not just saying that someone does a good job cleaning windows; you’re including a photo of a streak-free clean that showcases the quality level and proves you appreciate their work.
- To leave a paper trail. For example, some of our clients who are property managers ask their inspectors to photograph apartments after move-outs to keep a record in case of tenant disputes.
- To train your staff. Real photos from your sites are invaluable in training both inspectors and cleaning staff. In our recent interview with Mark Heller, who has overseen housekeeping operations for more than 500 healthcare facilities, he recommended photos as a very visual, easy-to-understand way to present cleaning standards to the housekeeping team.
- To see change over time. As you take photos during inspections over time, you’ll see how the quality of your cleaning changes (and, we hope, improves!) over time. This is visual evidence that your quality control process is working.
What’s the best method for including photos with an inspection?
Here’s what you don’t want: a random photo with no context or explanation.
To ensure photos are useful, they need context. We think the fastest, easiest way to provide that context is by linking the photo to a specific line item on the inspection form.
For example, here’s an example of an inspection report in OrangeQC. Notice how the photos of the floors show up in the “Floors” line item, which is highlighted as deficient:
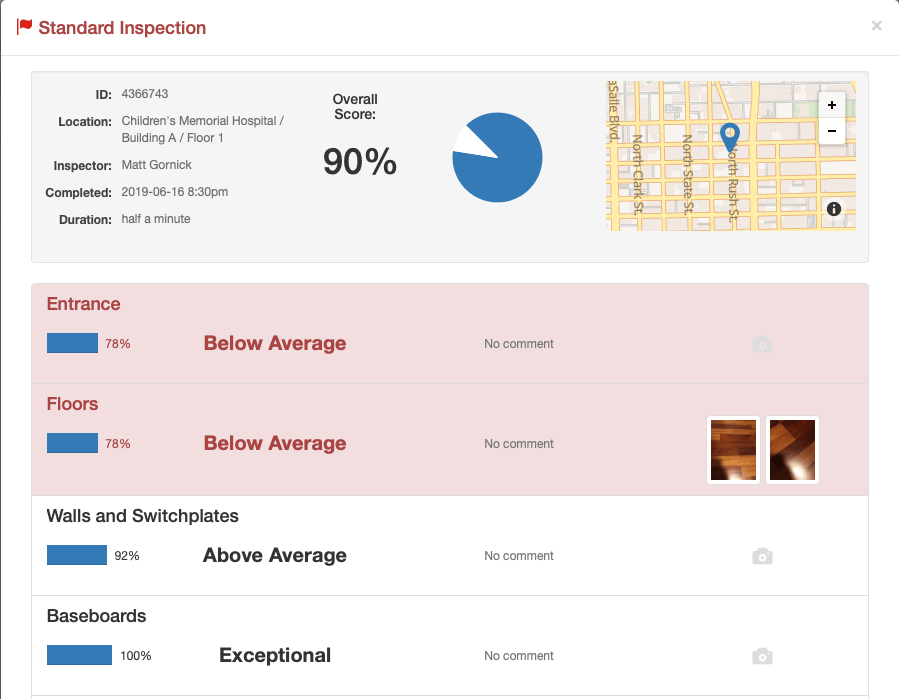
In many cases, that’s enough! If you’re grading the floors as deficient and the photo shows muddy footprints on the floor, there’s no reason to say anything else . . . and that’s great, because it speeds up the inspection process.
If it’s not clear what the photo is showing, however, the inspector should leave a quick note. For example, maybe the photo shows which section of the floor that needs to be cleaned. However, it might not be obvious that there’s leftover adhesive stuck to the floor that needs extra attention. Include a note whenever you need to clarify.
What are the pros and cons of using photos to track my team’s locations?
We know that some teams use photos as a method to “prove” that the inspector was on-site while performing the inspection. They might have inspectors take a photo at the building or on-site, separate from any inspection.
To be honest, we don’t love this strategy for every case. GPS is a much better tool for ensuring that inspectors are in the right place without requiring an extra step (or creating the impression that you don’t trust your team).
That’s not to say photos don’t already provide extra assurance that inspectors are in the right place. If your mobile inspections include GPS, timestamps, and the occasional photo, that should be more than enough to provide an extra layer of accountability.
For example, when the team at Licking/Knox Goodwill Industries, Inc. began using OrangeQC, supervisors noticed that one of their inspectors was submitting mobile inspections . . . but GPS coordinates revealed the person was actually at home. Even though the team hadn’t been using GPS for that reason, it gave them an early heads-up about a problem. (You can read more in our interview with Kathy Patton here.)
However, there are some contexts where asking your inspectors to take a photo to prove they are on-scene may make sense. For example, it may be required by your customer or organization. Or maybe your inspectors drive out to remote areas with poor cell service. And if you’re already using photos to leave a paper trail (such as dorm move-outs or apartment fixes), you’re already collecting photographic evidence that the inspector is on-site.
How can photos help track corrective actions?
As we said above, photos are great for closing the loop when there’s a problem. Whether it’s your team or a third-party team doing a re-inspection to ensure compliance, a photo ensures the deficiency has been fixed. The visual “before and after” showcases exactly how the problem was solved. It also proves you’re on top of issues.
These “before and after” snapshots are great to include in discussions with your customer or organization. They visually demonstrate the level of clean you’re providing and give insight into your team’s quality control process.
(In fact, you might also save some of the more dramatic transformations for your bid or marketing materials.)
You can also use these “before and after” photos to follow up with your cleaning team. Photos clearly illustrate what the problem was and how it needed to be fixed, which helps everyone get on the same page about the acceptable level of clean. These examples help standardize your inspection process and get everyone on the same page.
Photos are even more valuable if you’re working with outside vendors or contractors. They help you feel confident in the level of service and provide an extra layer of accountability.
How do I start using photos?
Let your inspectors know the what, why, and how of including photos with their inspections.
For example, you might say: “I’d like you to start including photos of line items that require a corrective action. If a dirty garbage can needs to be wiped down, snap a photo so that the cleaning team can see what was wrong and where to find it. You can just swipe left on a line item to bring up the camera.”
Start off by asking your inspectors to only take photos of deficiencies; then, add in excellent cleans you want to document. The fewer photos you take, the more powerful each one becomes. You don’t need a dozen photos of the same thing; you need just as many photos as it takes to have the conversations you need to have with your team, client, or organization.
Our best advice? Just get started. As time goes by, you’ll find the solution that works best for your team.
We hope this guide helps you use inspection photos to boost your quality control process! If you use OrangeQC mobile inspection forms and want additional help getting started, drop us a line: support@orangeqc.com.